Season
John Vukich
Pueblo West, CO
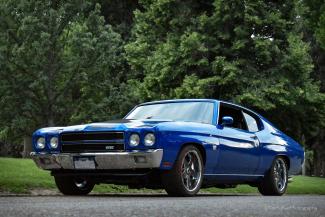
My project car is a 1970 Chevrolet Chevelle SS Resto-Mod that I purchased online from a dealer on the East Coast in 2011. I knew going in that the car had severe rust and would require a fair amount of sheet metal replacement, but the price was right even with cross-country shipping.
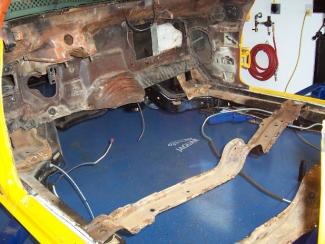
Once I received it, evaluation began, and I soon realized my anticipation of major sheet metal work was confirmed along with the need for new wiring, interior, and replacement of the powertrain which was a small block 350 and a Turbo-Hydramatic.
Before any work began, I needed to develop a work plan along with a prospective budget. Having worked as a Mechanical/Manufacturing Engineer, developing work plans was normal operating procedure. Spreadsheets were created and estimated replacement part costs captured.
Like anyone who’s worked on restoring old cars, the magic recipe is about time and money, and when you have one, you often don’t have the other, which led to this project spanning over 8 years!
At the time of taking on this project my niece Kelsey was 11 years old and nephew Jake was 7. Hanging out in my 1500 sq. ft. workshop, we decided we needed to give the car a name. It was late October, and my niece planned to dress up as Lucy from the Lucille Ball Show for Halloween, so the Chevelle would be known as Lucy! Kelsey helped pick the colors of Electric Blue with Gunmetal Gray Rally Stripes, and a charcoal gray/black interior with carbon fiber accents.
As the project developed, it was decided to do a full off-frame resto-mod. So, a friend and I built a rotisserie for my project and a 1966 Pontiac GTO he had in the works.
All underneath sheet metal was replaced along with other components plagued with severe rust. The hood was a new purchase to include the cowl induction profile since the Chevelle was not an original SS. Once the body was ready, it was bead blasted then primer applied. Next the frame was completely stripped and strengthening gussets and other supports were added to the frame in strategic locations to stiffen the overall frame. The side rails were boxed in. Then the frame was bead blasted and powder coated satin black.
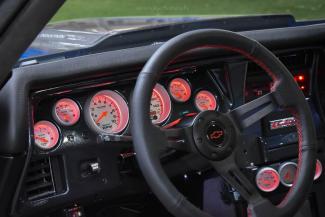
Suspension was upgraded with tubular A arms and QA1 adjustable coil-overs front and rear, Hotchkis pro touring sway-bars and trailing arms, SSBC disc brakes front and rear, Unisteer rack & pinion steering system, and Flaming River tilt column were installed. Stainless steel brake lines and fittings replaced the original system. A Wilwood master cylinder and Hydratech booster and proportioning valve were added. Overall, the car sits 2.0” lower than the stock height.
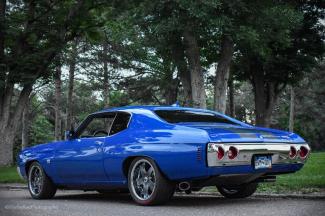
As for wheels and tires, we went with American Racing wheels with gun metal gray wrap applied to the spokes to match the rally stripes. 18x8” front and 18x10” rear wheels are fitted with BF Goodrich G-Force 255/40ZR18 and 295/35ZR18 tires respectively.
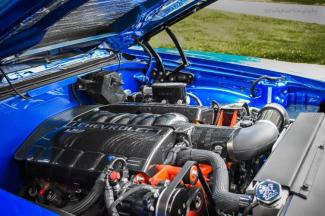
Turning to the powertrain, an LS3 crate motor coupled to a 4L60E performance transmission and custom length driveshaft provides power to the stock GM 12-bolt posi-trac rearend with 3:31 gears that was rebuilt. Ceramic-coated Hedman Headers lead to 3.0” stainless steel exhaust pipes with an X-pipe and Flowmaster 50 series mufflers.
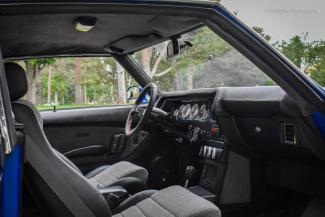
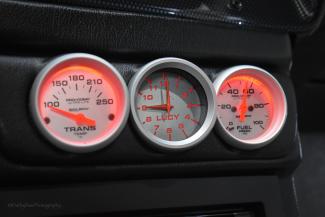
Knowing that Lucy would become Kelsey’s car someday, I wanted to add creature comforts and safety features. The interior was fitted with Cerullo SC Sport bucket seats and matching rear seat covered in black leather and charcoal gray cloth. Fiberglass door panels from Fesler were upholstered to match the seats. A center console from a 1978 Camaro was modified to accept a Pioneer Audio System with backup camera and GPS navigation. I also added gauges to monitor fuel pressure and transmission oil temperature and a custom monogramed Lucy clock along with dual USB charging ports. Power seats and windows adorn the interior. The entire interior was lined with sound/temperature foil insulation.
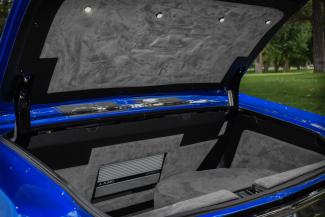
As for the trunk, it was also lined with insulation and matching carpet. Panels were fabricated from thermo-set plastic sheet for all four sides. The side panels conceal the jack and lug wrench on the left side, and on the right, it conceals a small toolkit, first-aid kit, and emergency blanket.
The rear panel wraps around the JL Audio 100a amplifier and conceals the car’s Viper Security System and stereo crossovers mounted to a custom fabricated panel. Beneath the trunk is a Rick’s stainless steel fuel tank and GM electric fuel pump/filter/regulator and II Much VSB Vent System.
A discerning eye will pick up that the rear bumper is from a 71-72 Chevelle, we liked the looks of it better than the stock 70 bumper! As of this writing, the car has received lots of attention at local car shows!